In this tutorial, we will go over how to set up WordPress with Nginx and MariaDB on Ubuntu 22.04 Linux Server. We will also configure Let’s Encrypt SSL certificate to secure our website.
Prerequisites
- This tutorial uses
sudouser to execute commands. Follow this link. - You must own a domain name and should have it pointing to the VPS server where you will be setting up WordPress.
- A sudo user must be configured. Follow this guide for more details.
Update Ubuntu 22.04
sudo apt-get updatesudo apt-get upgradelsb_release -aInstall Nginx on Ubuntu
sudo apt-get install nginxOutput of Nginx installation
rahil@Shared-WP-01:~$ sudo apt-get install nginx
[sudo] password for rahil:
Reading package lists... Done
Building dependency tree... Done
Reading state information... Done
The following additional packages will be installed:
  fontconfig-config fonts-dejavu-core libdeflate0 libfontconfig1 libgd3 libjbig0 libjpeg-turbo8 libjpeg8
  libnginx-mod-http-geoip2 libnginx-mod-http-image-filter libnginx-mod-http-xslt-filter libnginx-mod-mail
  libnginx-mod-stream libnginx-mod-stream-geoip2 libtiff5 libwebp7 libxpm4 nginx-common nginx-core
Suggested packages:
  libgd-tools fcgiwrap nginx-doc ssl-cert
The following NEW packages will be installed:
  fontconfig-config fonts-dejavu-core libdeflate0 libfontconfig1 libgd3 libjbig0 libjpeg-turbo8 libjpeg8
  libnginx-mod-http-geoip2 libnginx-mod-http-image-filter libnginx-mod-http-xslt-filter libnginx-mod-mail
  libnginx-mod-stream libnginx-mod-stream-geoip2 libtiff5 libwebp7 libxpm4 nginx nginx-common nginx-core
0 upgraded, 20 newly installed, 0 to remove and 5 not upgraded.
Need to get 2691 kB of archives.
After this operation, 8339 kB of additional disk space will be used.
Do you want to continue? [Y/n] Y
Get:1 http://mirrors.digitalocean.com/ubuntu jammy/main amd64 fonts-dejavu-core all 2.37-2build1 [1041 kB]
...
Get:20 http://mirrors.digitalocean.com/ubuntu jammy-updates/main amd64 nginx amd64 1.18.0-6ubuntu14.4 [3872 B]
Fetched 2691 kB in 7s (412 kB/s)
Preconfiguring packages ...
Selecting previously unselected package fonts-dejavu-core.
(Reading database ... 64277 files and directories currently installed.)
...
Setting up nginx-core (1.18.0-6ubuntu14.4) ...
 * Upgrading binary nginx                                                                                        [ OK ]
Setting up nginx (1.18.0-6ubuntu14.4) ...
Processing triggers for ufw (0.36.1-4ubuntu0.1) ...
Processing triggers for man-db (2.10.2-1) ...
Processing triggers for libc-bin (2.35-0ubuntu3.3) ...
Scanning processes...
Scanning candidates...
Scanning linux images...

Running kernel seems to be up-to-date.

Restarting services...
Service restarts being deferred:
 /etc/needrestart/restart.d/dbus.service
 systemctl restart getty@tty1.service
 systemctl restart networkd-dispatcher.service
 systemctl restart systemd-logind.service
 systemctl restart unattended-upgrades.service
 systemctl restart user@0.service
Check Nginx service status
sudo systemctl status nginxrahil@Shared-WP-01:~$ sudo systemctl status nginx
● nginx.service - A high performance web server and a reverse proxy server
Loaded: loaded (/lib/systemd/system/nginx.service; enabled; vendor preset: enabled)
Active: active (running) since Thu 2023-09-21 16:35:43 UTC; 53s ago
Docs: man:nginx(8)
Process: 19571 ExecStartPre=/usr/sbin/nginx -t -q -g daemon on; master_process on; (code=exited, status=0/SUCCESS)
Process: 19572 ExecStart=/usr/sbin/nginx -g daemon on; master_process on; (code=exited, status=0/SUCCESS)
Main PID: 19665 (nginx)
Tasks: 2 (limit: 1116)
Memory: 4.0M
CPU: 37ms
CGroup: /system.slice/nginx.service
├─19665 "nginx: master process /usr/sbin/nginx -g daemon on; master_process on;"
└─19668 "nginx: worker process" "" "" "" "" "" "" "" "" "" "" "" "" "" "" "" "" "" "" "" "" "" "" "" "" "">
Sep 21 16:35:43 Shared-WP-01 systemd[1]: Starting A high performance web server and a reverse proxy server...
Sep 21 16:35:43 Shared-WP-01 systemd[1]: Started A high performance web server and a reverse proxy server.Install MariaDB on Ubuntu
MariaDB is an alternative to MySQL database.
Install MariaDB:
sudo apt-get install mariadb-serverEnable MariaDB Service:
sudo systemctl enable mariadb.serviceRun mysql_secure_installation to start MySQL configuration:
sudo mysql_secure_installationNext, you will be asked to enter a password for root. Since it’s a new installation. The password will be empty, and you can hit enter to proceed with the next steps:
rahil@Shared-WP-01:~$ sudo mysql_secure_installation

NOTE: RUNNING ALL PARTS OF THIS SCRIPT IS RECOMMENDED FOR ALL MariaDB
      SERVERS IN PRODUCTION USE!  PLEASE READ EACH STEP CAREFULLY!

In order to log into MariaDB to secure it, we'll need the current
password for the root user. If you've just installed MariaDB, and
haven't set the root password yet, you should just press enter here.

Enter current password for root (enter for none):
If you get a prompt to switch to unix_socket authentication. Say No, we will enter a password on next step to secure root login.
OK, successfully used password, moving on...

Setting the root password or using the unix_socket ensures that nobody
can log into the MariaDB root user without the proper authorisation.

You already have your root account protected, so you can safely answer 'n'.

Switch to unix_socket authentication [Y/n]
Switch to unix_socket authentication [Y/n] n
... skipping.
You already have your root account protected, so you can safely answer 'n'.
Change the root password? [Y/n]In the above output, press Y to change root password and add set new password to secure root login to MySQL.
New password:
Re-enter new password:
Password updated successfully!
Reloading privilege tables..
 ... Success!


By default, a MariaDB installation has an anonymous user, allowing anyone
to log into MariaDB without having to have a user account created for
them.  This is intended only for testing, and to make the installation
go a bit smoother.  You should remove them before moving into a
production environment.

Remove anonymous users? [Y/n]
Next, you will be prompted to remove anonymous users. Press Y.
 ... Success!

Normally, root should only be allowed to connect from 'localhost'.  This
ensures that someone cannot guess at the root password from the network.

Disallow root login remotely? [Y/n]
Disallowing root login remotely is highly recommended. To proceed, kindly press the Y key.
 ... Success!

By default, MariaDB comes with a database named 'test' that anyone can
access.  This is also intended only for testing, and should be removed
before moving into a production environment.

Remove test database and access to it? [Y/n]
Please press Y to delete the test database.
 ... Success!

By default, MariaDB comes with a database named 'test' that anyone can
access.  This is also intended only for testing, and should be removed
before moving into a production environment.

Remove test database and access to it? [Y/n] Y
 - Dropping test database...
 ... Success!
 - Removing privileges on test database...
 ... Success!

Reloading the privilege tables will ensure that all changes made so far
will take effect immediately.

Reload privilege tables now? [Y/n]
To reload the privilege tables, please press Y.
 ... Success!

Cleaning up...

All done!  If you've completed all of the above steps, your MariaDB
installation should now be secure.

Thanks for using MariaDB!
Now, test MySQL root login:
mysql -u root -pIf you see the below prompt, that means you have successfully setup MariaDB.
rahil@Shared-WP-01:~$ mysql -u root -p
Enter password:
Welcome to the MariaDB monitor.  Commands end with ; or \g.
Your MariaDB connection id is 39
Server version: 10.6.12-MariaDB-0ubuntu0.22.04.1 Ubuntu 22.04

Copyright (c) 2000, 2018, Oracle, MariaDB Corporation Ab and others.

Type 'help;' or '\h' for help. Type '\c' to clear the current input statement.

MariaDB [(none)]>
Install PHP
For this tutorial, we will use PHP 8.1. Execute the below command to install PHP, PHP-FPM, and other packages.
sudo apt install php8.1 php8.1-fpm php8.1-mysql php8.1-mbstring php8.1-xml php8.1-gd php8.1-curl php8.1-imagick php8.1-zip php8.1-intl -yYou can find a list of recommended packages from WordPress official developer guide.
Create WordPress Database
Next, we will create a database for WordPress site.
Execute the below command to login as root to a MariaDB server.
mysql -u root -pLet’s create a new database called wordpress_tekspace. You can replace tekspace to your domain or sitename.
CREATE DATABASE wordpress_tekspace;Next, we will create a database user along with the password and grant permission for access.
GRANT ALL ON wordpress_tekspace.* TO 'wptekspaceuser'@'localhost' IDENTIFIED BY 'Password!123' WITH GRANT OPTION;Make sure to change the password with a strong password to your needs.
FLUSH PRIVILEGES;Configure Nginx
Now, we will setup Nginx for WordPress.
First, we will create public_html folder under /var/www/html/tekspace. Feel free to use your own folder path as you desire.
sudo mkdir -p /var/www/html/tekspace/public_htmlNow, let’s navigate to the folder path where Nginx stores server blocks configuration.
cd /etc/nginx/sites-available/Inside sites-available folder we will create a new file called tekspace.conf. Feel free to name it according to your preference.
sudo vi tekspace.confNext, paste the following content into tekspace.conf file.
server {
            listen 80;
            root /var/www/html/tekspace/public_html;
            index index.php index.html;
            server_name demo.tekspace.io;

	    access_log /var/log/nginx/tekspace.access.log;
    	    error_log /var/log/nginx/tekspace.error.log;

            location / {
                         try_files $uri $uri/ /index.php?$args;
            }

            location ~ \.php$ {
                         include snippets/fastcgi-php.conf;
                         fastcgi_pass unix:/run/php/php8.1-fpm.sock;
            }

            location ~ /\.ht {
                         deny all;
            }

            location = /favicon.ico {
                         log_not_found off;
                         access_log off;
            }

            location = /robots.txt {
                         allow all;
                         log_not_found off;
                         access_log off;
           }

            location ~* \.(js|css|png|jpg|jpeg|gif|ico)$ {
                         expires max;
                         log_not_found off;
           }
}
Once you have saved the file, let’s go ahead and test Nginx configuration by running a command.
sudo nginx -tOutput:
rahil@Shared-WP-01:/etc/nginx/sites-available$ sudo nginx -t
nginx: the configuration file /etc/nginx/nginx.conf syntax is ok
nginx: configuration file /etc/nginx/nginx.conf test is successful
The next step is to create a symbolic link to activate configuration in Nginx. Execute the below command while you are in sites-available folder path.
Navigate to sites-enabled folder.
cd /etc/nginx/sites-enabled/sudo ln -s ../sites-available/tekspace.conf .To verify, a new symbolic link has been created. Execute the below command:
Output:
rahil@Shared-WP-01:/etc/nginx/sites-enabled$ ls -l
total 0
lrwxrwxrwx 1 root root 34 Sep 21 16:35 default -> /etc/nginx/sites-available/default
lrwxrwxrwx 1 root root 32 Sep 21 21:02 tekspace.conf -> ../sites-available/tekspace.conf
Now, we need to reload Nginx to apply new changes:
sudo systemctl reload nginxDownload and set up WordPress
cd /var/www/html/tekspace/public_html
sudo wget https://wordpress.org/latest.tar.gz
sudo tar -zxvf latest.tar.gz
sudo mv wordpress/* .
sudo rm -rf wordpress
sudo rm -rf latest.tar.gz
What the above commands will do is, download a WordPress compressed file from a WordPress server. Then, it will extract all the files and folders. And move them to public_html folder path.
Next, we need to change the ownership from root to www-data:www-data to make sure proper permissions are set and not have root be owner of the files and folders.
cd /var/www/html/tekspace/public_html
sudo chown -R www-data:www-data *
sudo chmod -R 755 *
sudo chmod -R 664 *.php *.txt *.html
WordPress Database Configuration
In order for WordPress to run, we need to connect it to a MariaDB database server. Follow the below guide to set the database connection string.
The below command will rename wp-config-sample.php to wp-config.php. This is the file WordPress references during initial startup.
sudo mv wp-config-sample.php wp-config.phpOpen wp-config.php file in your favorite editor.
sudo vi wp-config.php
Replace the red-highlighted values in this file with the values that were set earlier in the tutorial when we set up the database for WordPress.
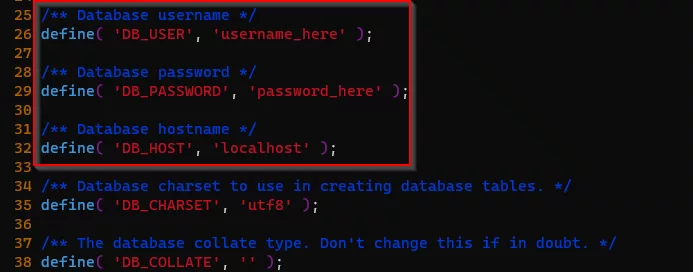
Here is how the file key value should look:
define( 'DB_NAME', 'wordpress_tekspace' );

/** Database username */
define( 'DB_USER', 'wptekspaceuser' );

/** Database password */
define( 'DB_PASSWORD', 'Password!123' );
Save the file.
Now, within the same file, scroll down where you will see below content:
define( 'AUTH_KEY', 'put your unique phrase here' );
define( 'SECURE_AUTH_KEY', 'put your unique phrase here' );
define( 'LOGGED_IN_KEY', 'put your unique phrase here' );
define( 'NONCE_KEY', 'put your unique phrase here' );
define( 'AUTH_SALT', 'put your unique phrase here' );
define( 'SECURE_AUTH_SALT', 'put your unique phrase here' );
define( 'LOGGED_IN_SALT', 'put your unique phrase here' );
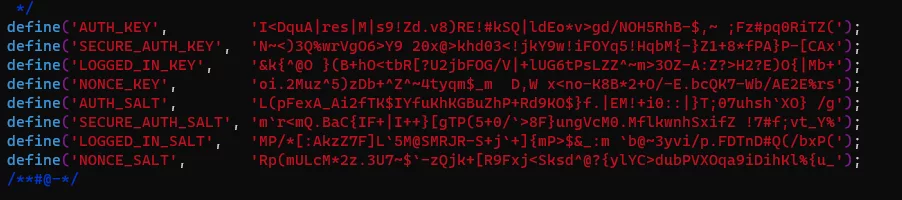
define( 'NONCE_SALT', 'put your unique phrase here' );We will replace this by opening this link in the browser, which will generate random strings for each key above. See the example below.
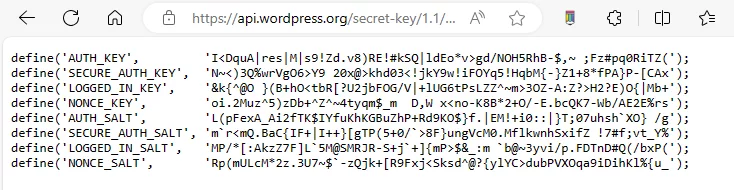
We will copy this content from the browser and replace all the values where it says put your unique phrase here. See the final file setting below:
Save and close the file. Open the domain URI that was set in the Nginx sites-available folder to run WordPress and finish the installation.
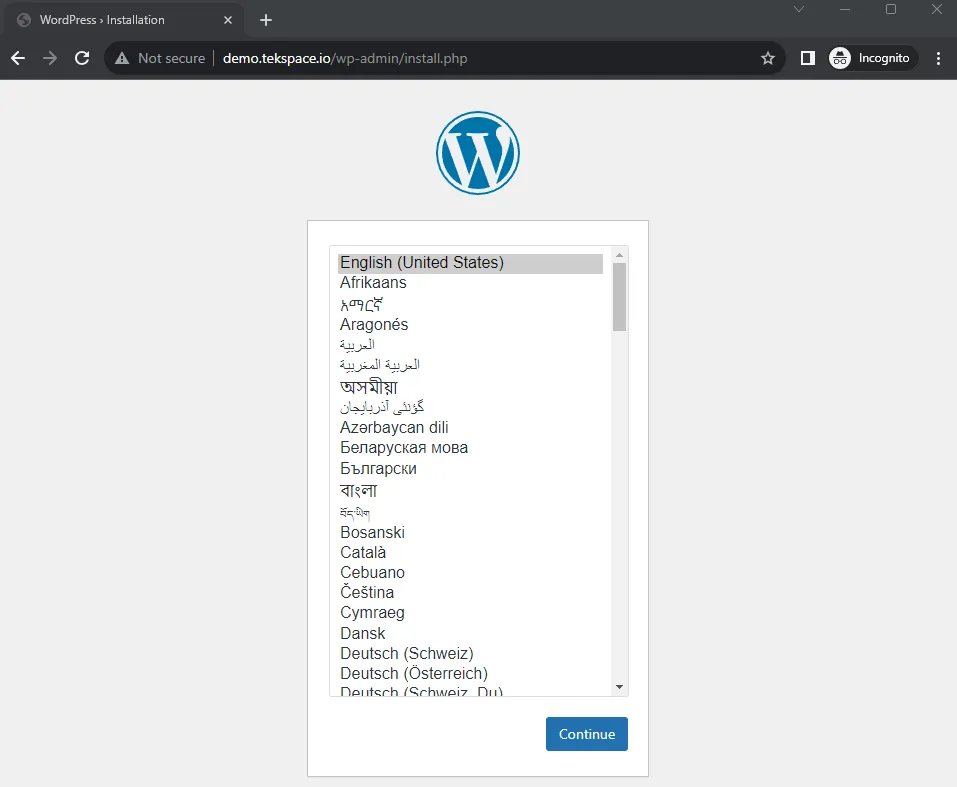
WordPress UI Installation Wizard
Browse the WordPress with dns alias you configured in Nginx. In my case, I will be using demo.tekspace.io. You should see the installation wizard as shown below:
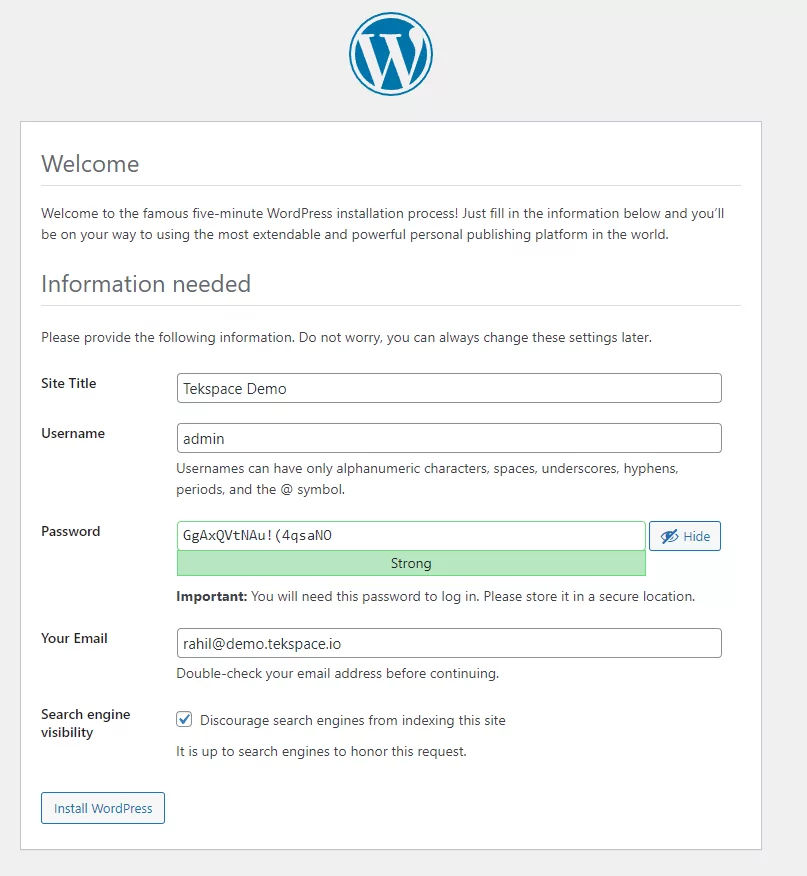
Click on the Continue button, where you will see a welcome page to set up site title, username, password, and email address. Enter the details and click on Install WordPress.
Next, you will be prompted to login. Enter the Username and Password you set during the installation process.
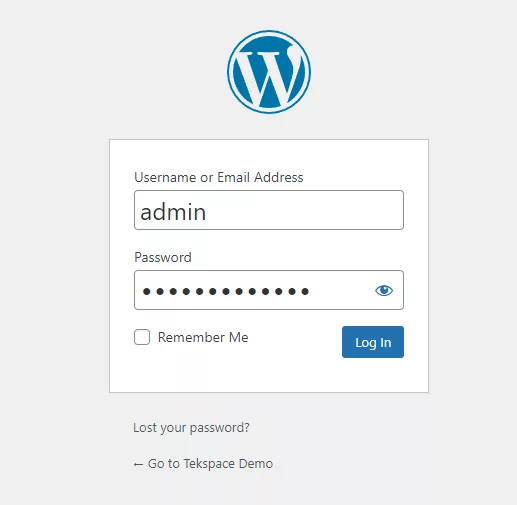
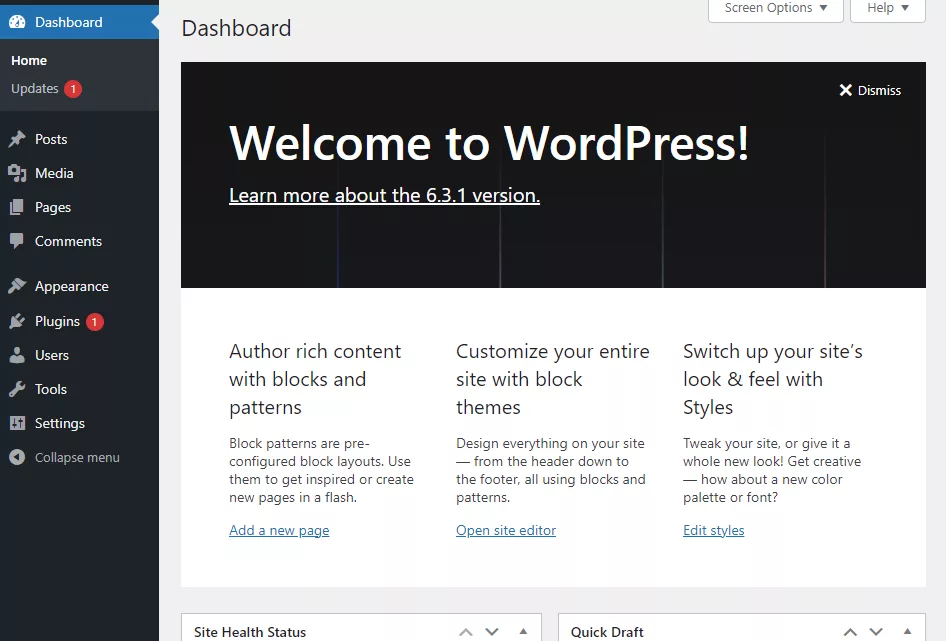
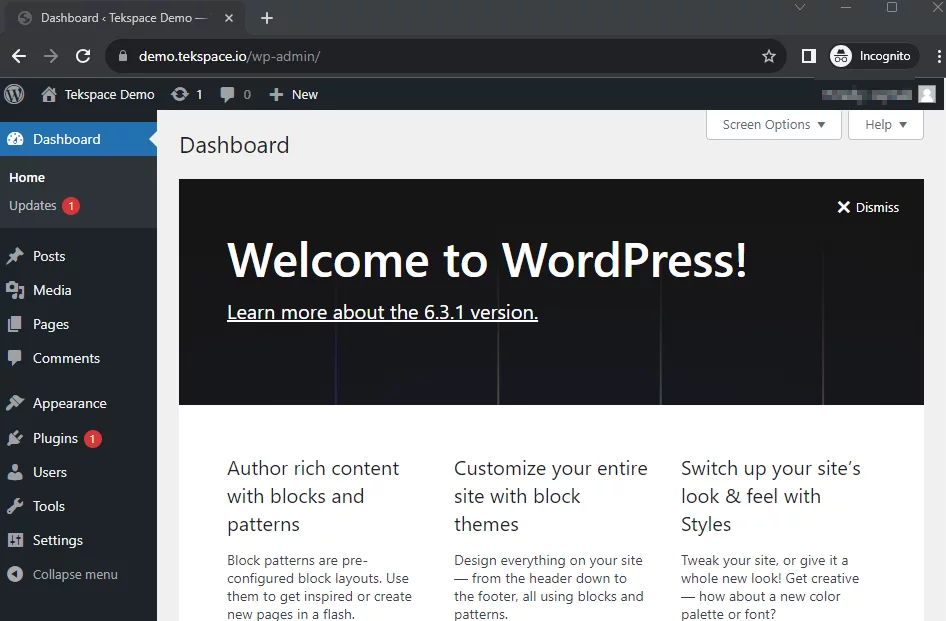
Once you log in, you will be redirected to the WordPress Dashboard:
The next step is to set up SSL by getting a certificate from Lets Encrypt. Follow the below guide to set up an SSL certificate.
WordPress with Lets Encrypt SSL Certificate
I have created an SSL guide for Nginx here. We will go through each step here.
Step 1: Install Certbot Software:
sudo apt install python3-certbot-nginx certbot Step 2: Retrieve new SSL certificate from Let’s Encrypt:
sudo certbot --nginx -d demo.tekspace.ioOnce you execute the above command, you will go through the Let’s Encrypt setup process. See the output for example:
rahil@Shared-WP-01:/var/log/nginx$ sudo certbot --nginx -d demo.tekspace.io
Saving debug log to /var/log/letsencrypt/letsencrypt.log
Enter email address (used for urgent renewal and security notices)
 (Enter 'c' to cancel): demo@demo.tekspace.io

- - - - - - - - - - - - - - - - - - - - - - - - - - - - - - - - - - - - - - - -
Please read the Terms of Service at
https://letsencrypt.org/documents/LE-SA-v1.3-September-21-2022.pdf. You must
agree in order to register with the ACME server. Do you agree?
- - - - - - - - - - - - - - - - - - - - - - - - - - - - - - - - - - - - - - - -
(Y)es/(N)o: Y

- - - - - - - - - - - - - - - - - - - - - - - - - - - - - - - - - - - - - - - -
Would you be willing, once your first certificate is successfully issued, to
share your email address with the Electronic Frontier Foundation, a founding
partner of the Let's Encrypt project and the non-profit organization that
develops Certbot? We'd like to send you email about our work encrypting the web,
EFF news, campaigns, and ways to support digital freedom.
- - - - - - - - - - - - - - - - - - - - - - - - - - - - - - - - - - - - - - - -
(Y)es/(N)o: N
Account registered.
Requesting a certificate for demo.tekspace.io

Successfully received certificate.
Certificate is saved at: /etc/letsencrypt/live/demo.tekspace.io/fullchain.pem
Key is saved at:         /etc/letsencrypt/live/demo.tekspace.io/privkey.pem
This certificate expires on 2023-12-20.
These files will be updated when the certificate renews.
Certbot has set up a scheduled task to automatically renew this certificate in the background.

Deploying certificate
Successfully deployed certificate for demo.tekspace.io to /etc/nginx/sites-enabled/tekspace.conf
Congratulations! You have successfully enabled HTTPS on https://demo.tekspace.io

- - - - - - - - - - - - - - - - - - - - - - - - - - - - - - - - - - - - - - - -
If you like Certbot, please consider supporting our work by:
 * Donating to ISRG / Let's Encrypt:   https://letsencrypt.org/donate
 * Donating to EFF:                    https://eff.org/donate-le
- - - - - - - - - - - - - - - - - - - - - - - - - - - - - - - - - - - - - - - -
The main part that we need to see from the above output is this:
Deploying certificate
Successfully deployed certificate for demo.tekspace.io to /etc/nginx/sites-enabled/tekspace.conf
Congratulations! You have successfully enabled HTTPS on https://demo.tekspace.io
Now, when you browse the website, you should see a valid certificate.
Setup Lets Encrypt Certificate in Non-Interactive Mode
This step is optional, but if you want to set up Lets Encrypt certificate in non-interactive mode. Make sure to replace values accordingly to ensure the certificate is created successfully.
sudo certbot --nginx -d domain.com -d www.domain.com -m example@outlook.com --agree-tos --non-interactiveTroubleshooting guide
WordPress Nginx 404 Not Found Error
If you see a 404 page when you browse the page. Follow the below guide:
Open sudo vi /etc/nginx/sites-available/tekspace.conf and find below content:
sudo vi /etc/nginx/sites-available/tekspace.confReplace below:
location / {
   try_files $uri $uri/ =404;
}
With:
location / {
   try_files $uri $uri/ /index.php?$args;
}
Next, reload Nginx service to apply new changes:
sudo systemctl reload nginxThis should definitely fix a 404 page not found error.
How to Fix the 413 Request Entity Too Large on WordPress
If you see a 413 error when uploading WordPress backup in WPVivid. Enter the below values in nginx.conf file under http block.
sudo vi /etc/nginx/nginx.confhttp {
server_tokens off;
send_timeout 300s;
client_header_timeout 300s;
client_body_timeout 300s;
client_max_body_size 100m;
server_names_hash_max_size 65536;
server_names_hash_bucket_size 1024;Advance level Configuration
If you want to segregate your WordPress site into its own PHP-FPM pool to better manage PHP-related configuration at site level. Follow this guide.