
NGINX is a high-performance open-source web server and reverse proxy server software. It’s designed to efficiently handle simultaneous client requests, making it well-suited for serving web content, applications, and APIs. NGINX’s architecture prioritizes speed, scalability, and reliability, making it popular for powering modern websites and applications. It also acts as a load balancer, caching server, and SSL/TLS termination point, enhancing security and optimizing web traffic delivery.
In this tutorial, we will guide you on how to install and nginx web server to host applications.
Prerequisites
- Ubuntu 22.04 server on your local PC or on Cloud.
- Configure DNS or IP settings (optional).
Step 1: Install Nginx
To install Nginx, we will use apt command to pull new packages and initiate installation.
First, we must make sure our Ubuntu server has all the latest updates.
sudo apt updateSecond, install NGINX package.
sudo apt install nginxStep 2: Firewall settings
nginx will add itself as a service to firewall settings upon installation. To see the application configurations, execute the below command:
sudo ufw app listThis will show all the application services as shown in below output:
rahil@ubuntu:~$ sudo ufw app list
Available applications:
  Nginx Full
  Nginx HTTP
  Nginx HTTPS
  OpenSSH
In the above output, you will see three NGINX profiles:
- Nginx Full: This configuration unlocks both port 80 (standard, unencrypted web traffic) and port 443 (TLS/SSL encrypted traffic).
- Nginx HTTP: This setup specifically enables port 80 for handling standard, unencrypted web traffic.
- Nginx HTTPS: This configuration solely accesses port 443 (TLS/SSL encrypted traffic).
For this tutorial, I will enable both HTTP and HTTPS on port 80 and 443 by using `Nginx Full`. Use the below command to allow traffic:
sudo ufw allow 'Nginx Full'Output:
rahil@ubuntu:~$ sudo ufw allow 'Nginx Full'
Rules updated
Rules updated (v6)
Next, we will output the status of what is allowed from the firewall.
sudo ufw statusOutput:
rahil@ubuntu:~$ sudo ufw status
Status: inactive
If you see the above status as inactive, you can use enable to start the firewall on Ubuntu.
sudo ufw enableOutput:
rahil@ubuntu:~$ sudo ufw enable
Command may disrupt existing ssh connections. Proceed with operation (y|n)? Y
Firewall is active and enabled on system startup
Now, let’s see the status one more time.
rahil@ubuntu:~$ sudo ufw status
Status: active

To                         Action      From
--                         ------      ----
Nginx Full                 ALLOW       Anywhere
Nginx Full (v6)            ALLOW       Anywhere (v6)
As you can see in the above status, NGINX is allowed both on IP v4 and IP v6.
Step 3: NGINX Server Status
Once, you have completed NGINX server installation and firewall configuration. It’s time to test out to see if your web server is up and running.
Execute below command to check NGINX service status.
systemctl status nginxOutput:
rahil@ubuntu:~$ systemctl status nginx
● nginx.service - A high performance web server and a reverse proxy server
     Loaded: loaded (/lib/systemd/system/nginx.service; enabled; vendor preset: enabled)
     Active: active (running) since Wed 2023-08-30 20:14:38 UTC; 25min ago
       Docs: man:nginx(8)
    Process: 8855 ExecStartPre=/usr/sbin/nginx -t -q -g daemon on; master_process on; (code=exited, status=0/SUCCESS)
    Process: 8856 ExecStart=/usr/sbin/nginx -g daemon on; master_process on; (code=exited, status=0/SUCCESS)
   Main PID: 8952 (nginx)
      Tasks: 2 (limit: 512)
     Memory: 5.7M
        CPU: 57ms
     CGroup: /system.slice/nginx.service
             ├─8952 "nginx: master process /usr/sbin/nginx -g daemon on; master_process on;"
             └─8955 "nginx: worker process" "" "" "" "" "" "" "" "" "" "" "" "" "" "" "" "" "" "" "" "" "" "" "" "" "" "" ""
From the above output, you can see that the NGINX service is in active status.
Now we need to verify from the browser to make sure we can browse the default NGINX HTML page. You can browse using your Ubuntu server IP address.
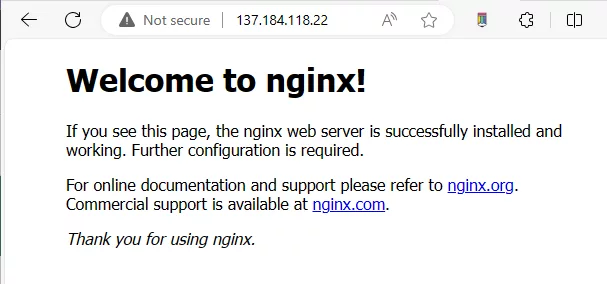
That’s it! If you see above page, your NGINX server is up and running.
Step 4: Setup Server blocks
In Nginx web server, you can use server blocks to encapsulate configuration details and host multiple domains on a single server. In this guide, we’ll configure a domain named “demo.tekspace.io”; however, ensure to substitute this with your actual domain name.
By default, Nginx on Ubuntu 20.04 includes a single enabled server block configured to serve documents from the /var/www/html directory. While this setup suits a single site, it can become cumbersome for multiple sites. Instead of modifying the /var/www/html directory, we’ll establish a directory structure within /var/www for our “demo.tekspace.io” site. This approach keeps /var/www/html as the default directory for serving content when a client request doesn’t match any other sites.
To create the directory for “demo.tekspace.io,” use the following command, utilizing the -p flag to generate any requisite parent directories:
sudo mkdir -p /var/www/demo_tekspace_io/htmlNow, we need to set permissions to allow current non-root users to be able to access the folder. You can use any username you like. In my case I will use user rahil.
sudo chown -R $USER:$USER /var/www/demo_tekspace_io/htmlIf you haven’t altered your umask value, which determines the default file permissions, your web roots’ permissions should be accurate. To check if the owner has the necessary permissions to read, write, and execute files, while giving only read and execute permissions to groups and others, use this command:
sudo chmod -R 755 /var/www/demo_tekspace_ioNext, we will create a new HTML file to serve a simple HTML page.
sudo nano /var/www/demo_tekspace_io/html/index.htmlPaste this simple HTML content:
<html>
    <head>
        <title>Welcome to Tekspace!</title>
    </head>
    <body>
        <h1>Your Tekspace landing page is working properly.</h1>
    </body>
</html>
Save the file by pressing Ctrl+O and then enter. To close the file press Ctrl+X and then enter.
Next, to serve above content, we need to create a server block file. Execute the below command to create a new file under /etc/nginx/sites-available/:
sudo nano /etc/nginx/sites-available/demo_tekspace_ioPaste the below content and save and exit the file:
server {
        listen 80;
        listen [::]:80;

        root /var/www/demo_tekspace_io/html;
        index index.html index.htm index.nginx-debian.html;

        server_name demo.tekspace.io www.demo.tekspace.io;

        location / {
                try_files $uri $uri/ =404;
        }
}
Observe that we’ve revised the root configuration to correspond with our new directory and adjusted the server_name to align with our domain name.
Subsequently, we’ll activate the file by establishing a link from it to the sites-enabled directory. This directory is read by Nginx during startup:
sudo ln -s /etc/nginx/sites-available/blog_tekspace_io /etc/nginx/sites-enabled/Keep in mind: Nginx employs a widely used method known as symbolic links, or symlinks, to manage the activation of server blocks. Crafting a symlink is akin to forming a disk shortcut. You can disable the server block by removing the symlink from the sites-enabled directory. However, you will still have the server block in the sites-available directory if you need it later.
To circumvent potential hash bucket memory issues that might occur when introducing extra server names, it’s essential to modify a singular value within the /etc/nginx/nginx.conf file. Proceed to open the file:
sudo nano /etc/nginx/nginx.confFind server_names_hash_bucket_size and remove # symbol to uncomment the line and save the file.
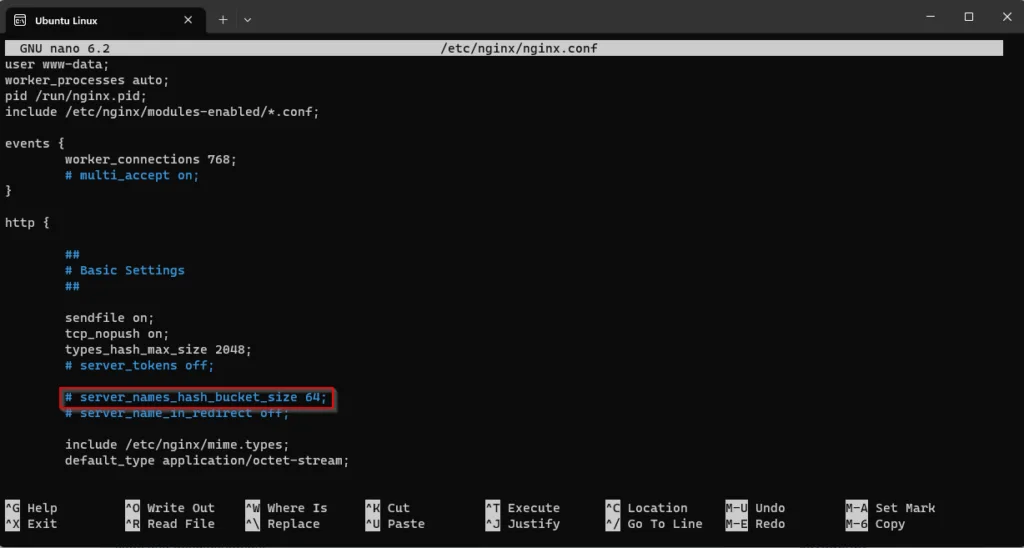
The content should look like this:
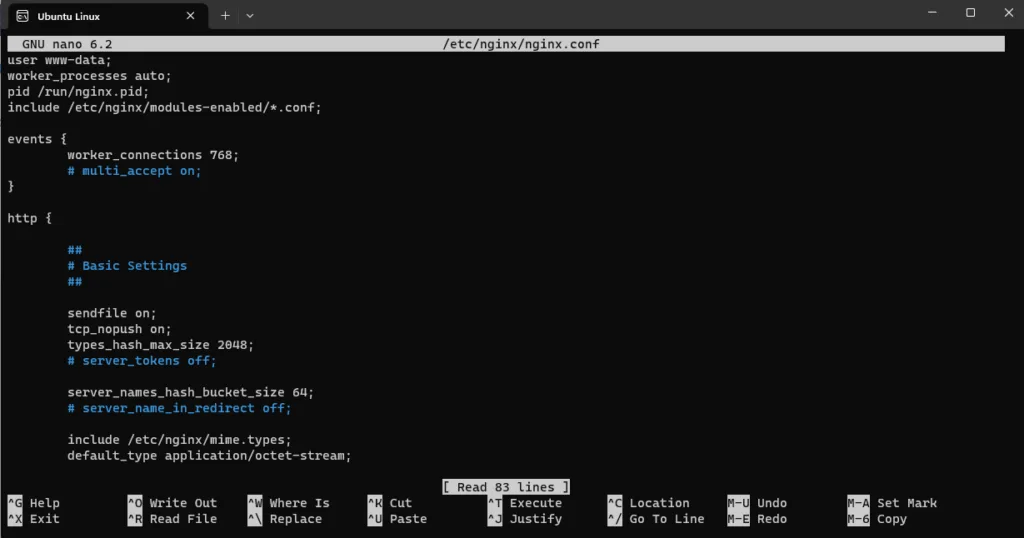
After you have saved the above file, we need to test Nginx configuration. Execute the below command:
sudo nginx -tOutput:
rahil@ubuntu:/etc/nginx/sites-enabled$ sudo nginx -t
nginx: the configuration file /etc/nginx/nginx.conf syntax is ok
nginx: configuration file /etc/nginx/nginx.conf test is successful\
If there are no errors in the output that means the configurations are applied currently. We will now restart Nginx service to apply new changes.
sudo systemctl restart nginxBrowse your website with the domain name you set it up:

Now that you have successfully completed Nginx setup. I highly recommend setting up a Let’s Encrypt certificate. Here is the link to the tutorial.