If you are interested in learning how Kubernetes works, you came to the right place! In this tutorial, I will show you how to quickly set up a local Kubernetes environment using Minikube to run hello-world app in a container.
Pre-requisites
Let’s ensure we have prerequisites installed before we get started with Minikube installation. If you already have the below items installed, you can skip them and proceed with Minikube setup.
Installing Minikube
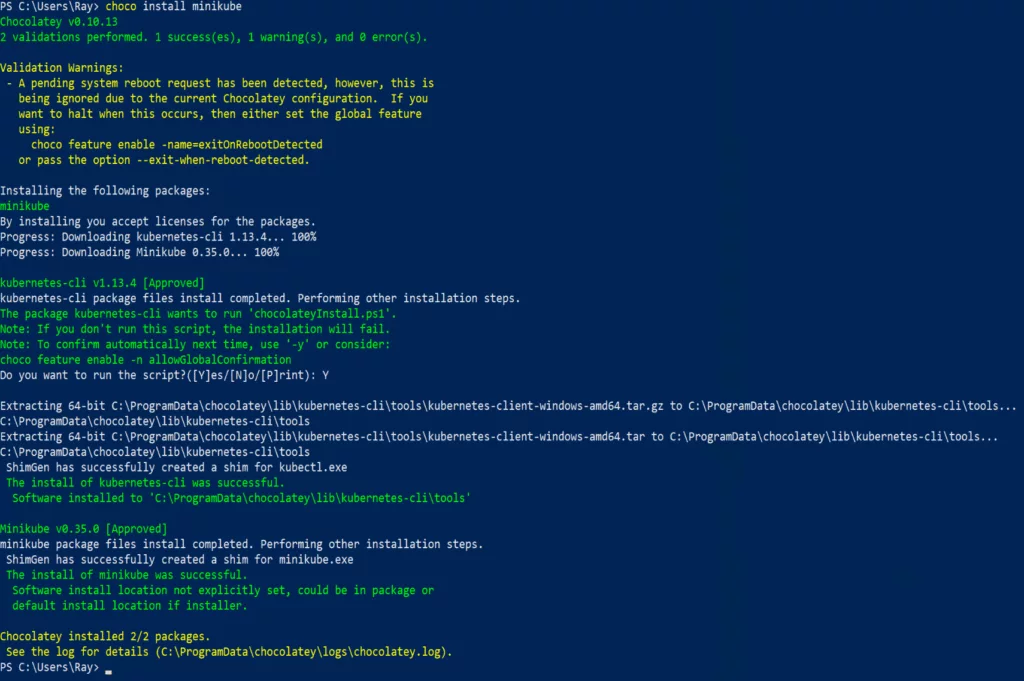
Step 1: Open the PowerShell console as an administrator.
Step 2: Install Minikube by executing the below command:
choco install minikubeNOTE: It may take a while to install Minikube depending on your network speed.
Verify your installation succeeded, and it should look like as shown below:
Setting up Hyper-V environment
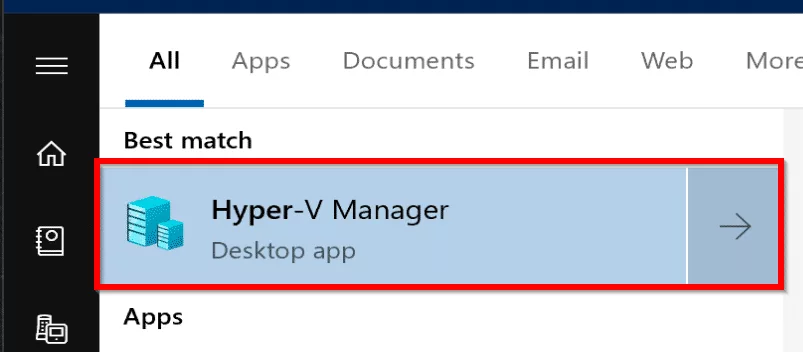
Step 1: Open Hyper-V manager.
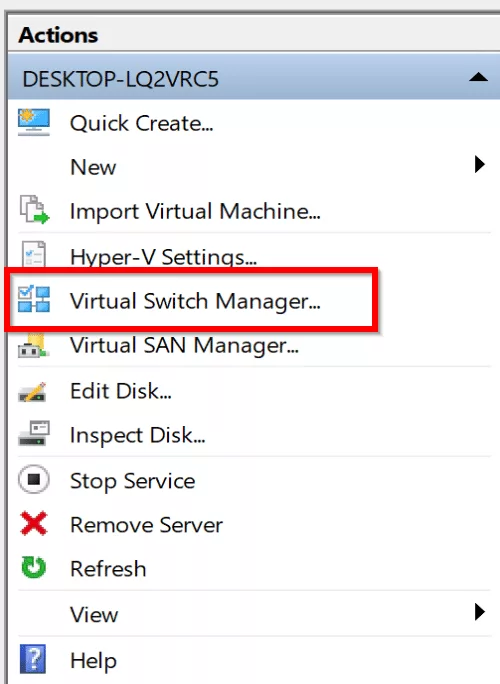
Step 2: Open Virtual Switch Manager from the Action panel on the right-hand side.
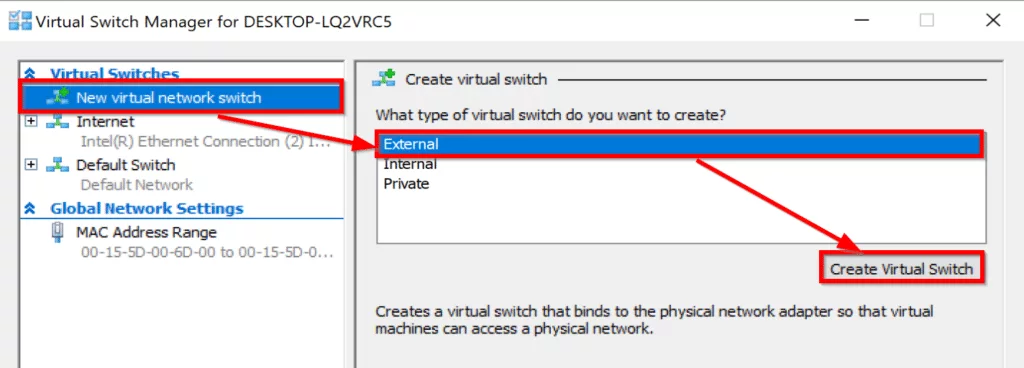
Step 3: Select New virtual network switch -> select External -> click on Create Virtual Switch.
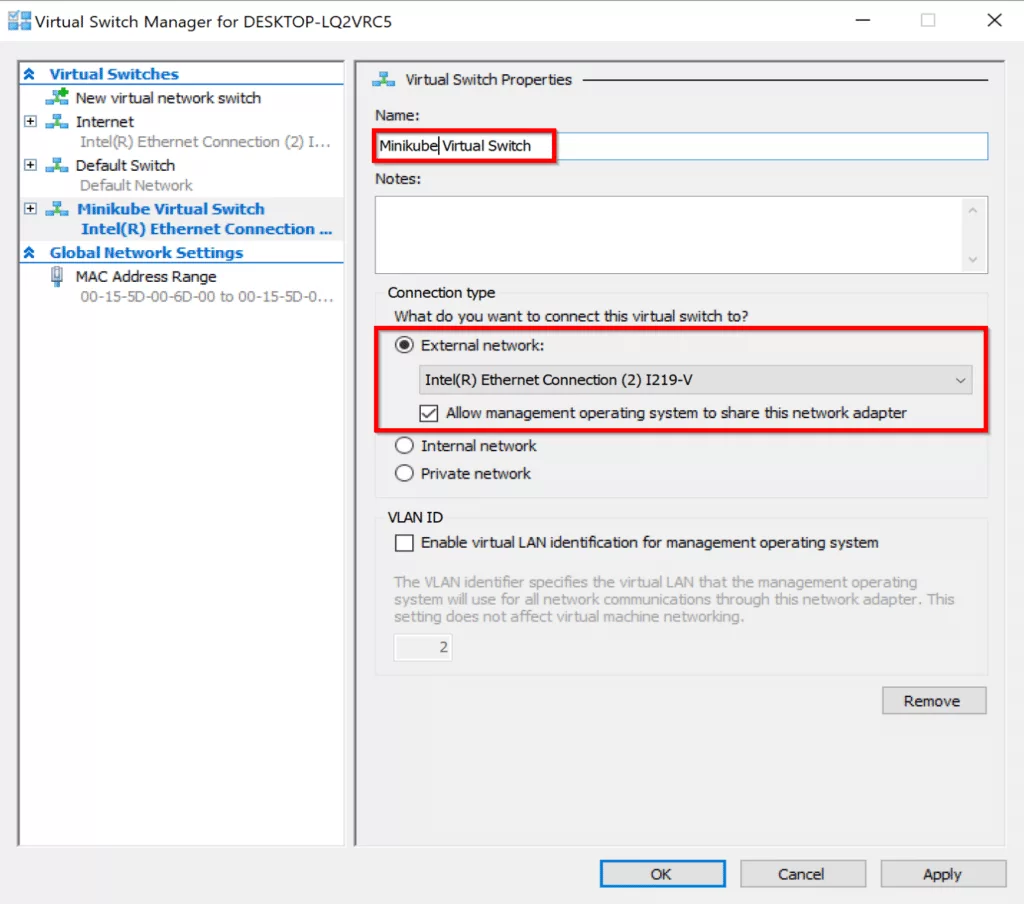
Step 4: Name your virtual switch Minikube Virtual Switch, select correct LAN settings that give access to the internet and click on apply and ok.
NOTE: If you already have
virtual switchcreated before, you may not need to set up virtual switch. This instruction is for newly installed hyper-v environments.
Starting Minikube
Open PowerShell as an administrator. If you already have it opened then you can ignore this step.
Execute the below command to start Minikube:
minikube start --vm-driver hyperv --hyperv-virtual-switch "Minikube Virtual Switch"NOTE: If your virtual switch name is different from
Minikube Virtual Switch, you can replace that in the above command.
Once Minikube has started, you will receive the below output, and you are ready to execute the Kubernetes command and deploy a container.
setup output:
o   minikube v0.35.0 on windows (amd64)
>   Creating hyperv VM (CPUs=2, Memory=2048MB, Disk=20000MB) ...
@   Downloading Minikube ISO ...
 184.42 MB / 184.42 MB [============================================] 100.00% 0s
-   "minikube" IP address is 192.168.0.106
-   Configuring Docker as the container runtime ...
-   Preparing Kubernetes environment ...
@   Downloading kubeadm v1.13.4
@   Downloading kubelet v1.13.4
:   Waiting for pods: apiserver proxy etcd scheduler controller addon-manager dns
-   Configuring cluster permissions ...
-   Verifying component health .....
+   kubectl is now configured to use "minikube"
=   Done! Thank you for using minikube!
To check if you have a successful connection to Kubernetes cluster, execute the below command from the PowerShell console.
kubectl get pods -n kube-systemOutput:
NAME                               READY   STATUS    RESTARTS   AGE
coredns-86c58d9df4-87cj9           1/1     Running   0          3m5s
coredns-86c58d9df4-bg64j           1/1     Running   0          3m5s
etcd-minikube                      1/1     Running   0          2m9s
kube-addon-manager-minikube        1/1     Running   0          2m16s
kube-apiserver-minikube            1/1     Running   0          2m20s
kube-controller-manager-minikube   1/1     Running   0          2m14s
kube-proxy-wnxk4                   1/1     Running   0          3m5s
kube-scheduler-minikube            1/1     Running   0          2m23s
storage-provisioner                1/1     Running   0          2m4s
Deploying your first container
To deploy your first container in your Minikube cluster, execute deploy command.
kubectl create deployment hello-world --image=kitematic/hello-world-nginxThe above command will pull a new image from Docker hub from a public registry and run a container in your Minikube Kubernetes cluster.
To check the status of a container, execute the below command.
kubectl get podsOutput:
PS C:\Users\Ray> kubectl get pods
NAME                           READY   STATUS    RESTARTS   AGE
hello-world-7cbc87684d-pmwxl   1/1     Running   0          4m50s
Accessing your hello-world app
In order to access your hello-world application outside of Kubernetes cluster, you need to expose it as a service.
kubectl expose deployment hello-world --port=80 --type=NodePortOnce the service has been created, you will need to get a port number of your exposed service to be able to browse the application. Execute the below command.
kubectl.exe get servicesoutput:
PS C:\Users\Ray> kubectl.exe get services
NAME TYPE CLUSTER-IP EXTERNAL-IP PORT(S) AGE
hello-world NodePort 10.96.79.70 <none> 80:31548/TCP 8m9s
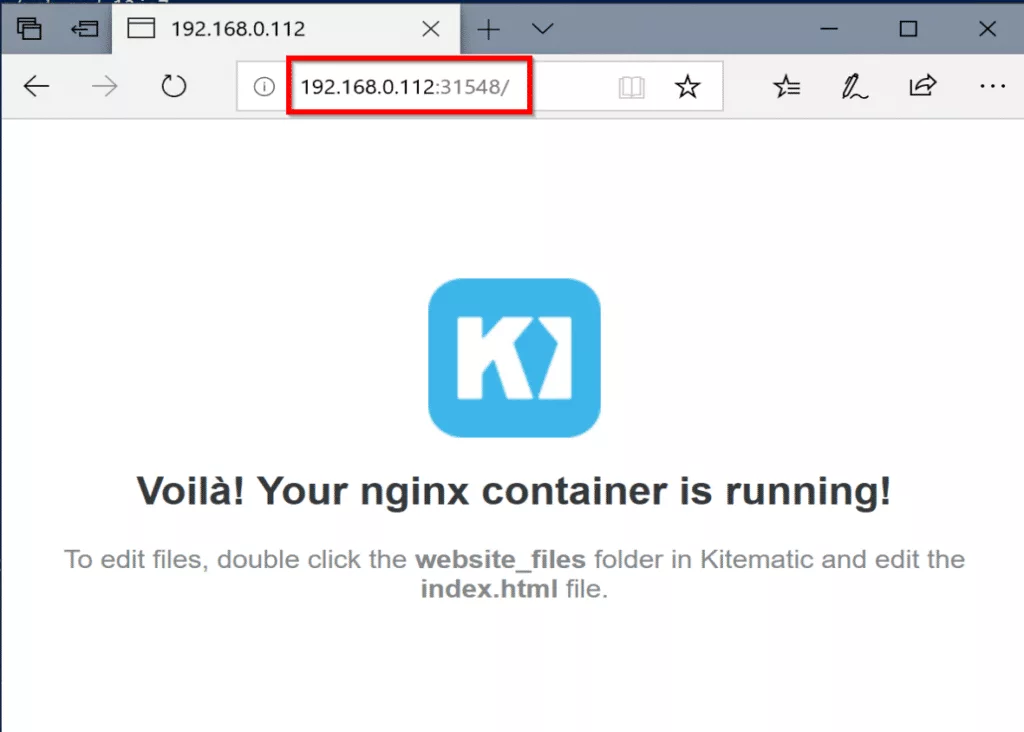
kubernetes ClusterIP 10.96.0.1 <none> 443/TCP 21hWhen you expose a service, Kubernetes will automatically create a port number randomly. In my case it is 31548 for hello-world application. I will append this at the end of the Minikube node IP address to access the application.
To get Minikube IP address, execute the below command:
minikube ipIn my case, I received 192.168.0.112. I will use this IP address to access the application as shown in the below screenshot.
Kubernetes dashboard
Kubernetes provides a free dashboard to also manage your cluster via UI. To access Kubernetes dashboard, you will need to execute the below Minikube command.
minikube dashboard You will see below output upon initialization.
PS C:\Users\Ray\Downloads> minikube.exe dashboard
- Enabling dashboard ...
- Verifying dashboard health ...
- Launching proxy ...
- Verifying proxy health ...
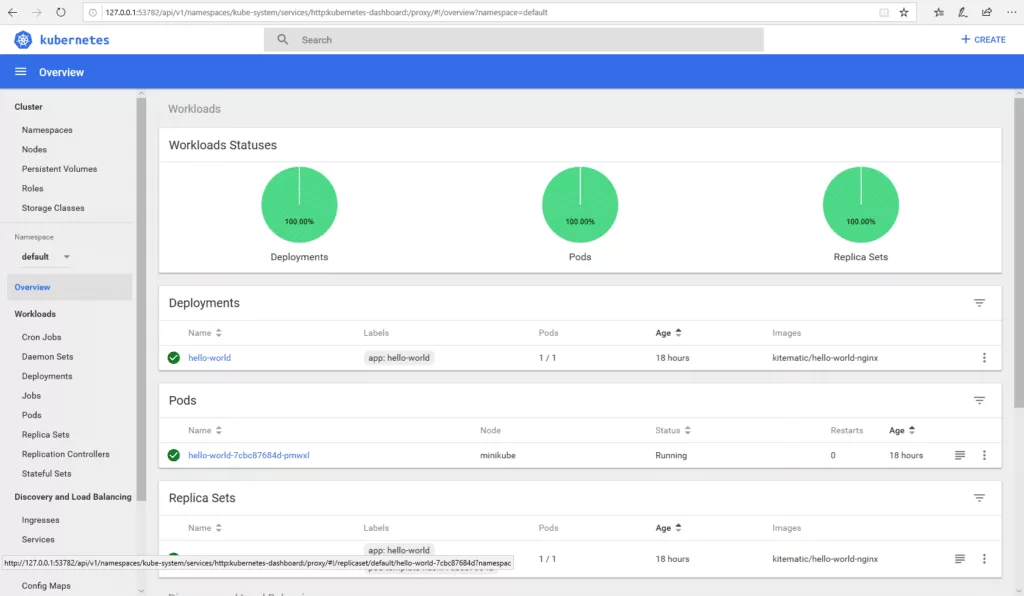
- Opening http://127.0.0.1:53782/api/v1/namespaces/kube-system/services/http:kubernetes-dashboard:/proxy/ in your default browser...Once the initialization is completed, the dashboard should open in your default browser. If it didn’t open you can browse it by opening this link
You are all set! You can now navigate the dashboard and get familiar with pods, services, and many more.
Thank you for following this tutorial! Hope this helped you get started with Kubernetes.